Pope Tech and Canvas Accessibility
Pope Tech And Canvas Accesibility Flex Workshop Recordings
- PopeTech and SensusAccess ( Zoom Recording, 47 minutes) – 1/12/2024 workshop by Aaron Holmes and Nadia Khan
- Canvas Tricks and Treats: PopeTech (Zoom Recording, 14 minutes ) – 8/18/2022 workshop by Nadia Khan
Pope Tech is an accessibility remediation tool available to instructors in Canvas. This tool gives instructors a quick but powerful way to check for and fix common accessibility concerns in Canvas content. Ensuring your Canvas courses are free of accessibility concerns helps support inclusion and equity for all students, and also is a requirement of MiraCosta policies as well as state and federal regulations.
MiraCosta College has two Pope Tech Canvas LMS tools:
- Accessibility Guide – a page-by-page accessibility checker and remediation assistant for Canvas
- Accessibility Dashboard – a course-level dashboard allowing you to review and correct accessibility issues throughout an entire Canvas course
Pope Tech Canvas LMS Tool Resources
- Use the Canvas Accessibility Instructor Dashboards is a step by step guide to getting started with the PopeTech Dashboards tool in Canvas.
- Pope Tech Accesibility Guide Overview (PDF) is a handy 2-page overview. You may also watch this 7-minute video for a helpful demonstration of how Pope Tech works in Canvas:
Pope Tech Detailed Guidance
Click any of the items below to view more details, including video guides, for using Pope Tech.
What Canvas elements can faculty test with Pope Tech?
Most areas where faculty use the Canvas Rich Content Editor can be tested with Pope Tech:
- Canvas pages
- Syllabus
- Quiz descriptions
- Discussion Topics
- Assignments
- Announcements
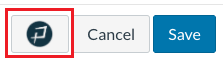
To test a Canvas item for accessibility concerns, activate Pope Tech by selecting the ![]() button at left of the Cancel and Save buttons while editing any of the Canvas items above. Pope Tech works even when the item is not yet published.
button at left of the Cancel and Save buttons while editing any of the Canvas items above. Pope Tech works even when the item is not yet published.
What does Pope Tech check for?
- If headers are present or skipped
- Flags suspicious alt text for images (contains “image of”, “image”, etc.)
- Color contrast between text and highlighted colored-background
(Note: doesn’t check color contrast within images) - If font size is readable
- Flags non-descriptive links such as “click here”, “link”, “more”, “read more”
- Flags redundant links
- Flags tables that lack at least one header and caption.
- Flags YouTube, Canvas embedded video and Canvas embedded audio to bring awareness media will need to be manually reviewed for captions
- Flags potential inaccessible files that need to be manually reviewed
Using Pope Tech is simple and intuitive.
Step 1: Open Pope Tech
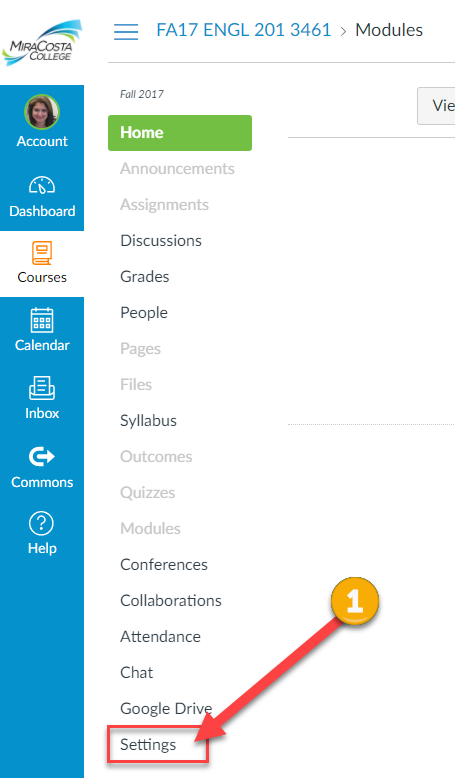
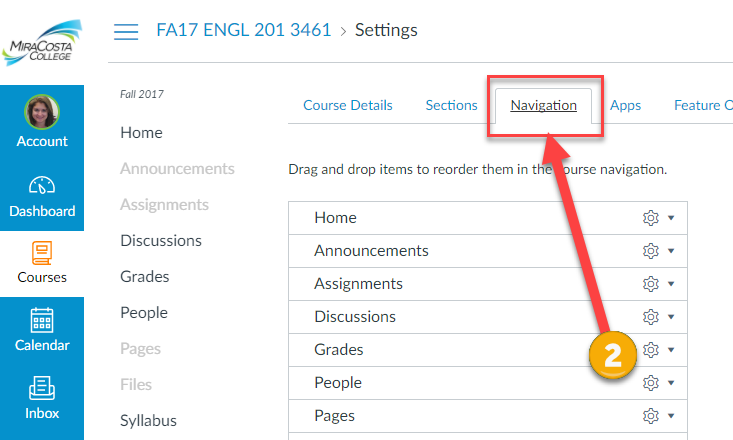
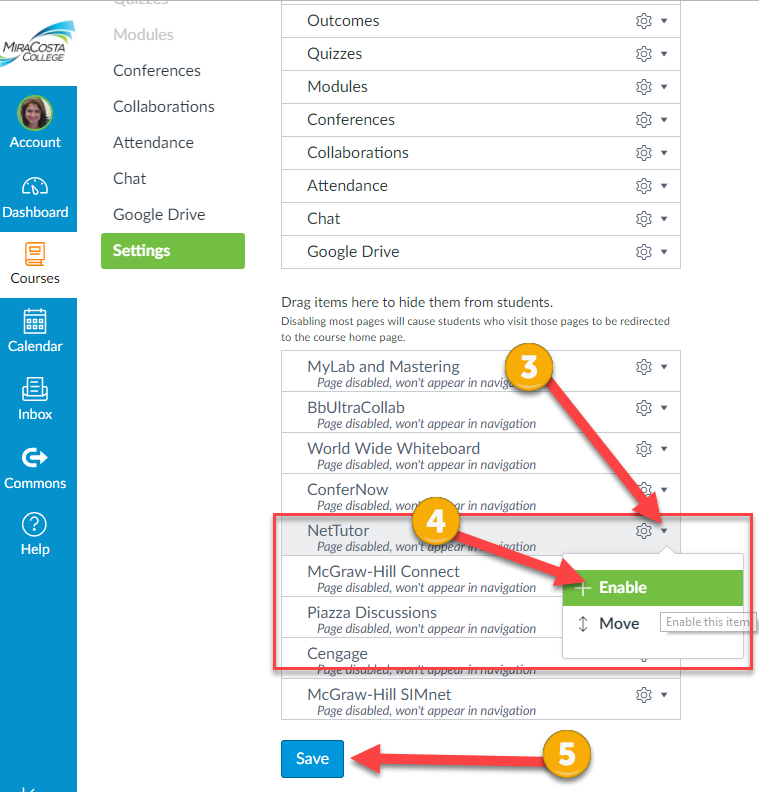
To access the PopeTech Course Dashboard tool, click Pope Tech Accessibility in any Canvas course menu.
To test an individual Canvas item for accessibility concerns, activate Pope Tech by selecting the icon next to the Cancel and Save buttons on a Canvas item while using the Rich Content Editor.
Step 2: Use Pope Tech to Locate and Fix Accessibility Issues
When Pope Tech is activated, the Pope Tech menu appears on the right-hand side of the screen. At the top of the interface, the number of errors and alerts will need to be addressed.
- Errors are accessibility errors and should be looked at for remediation.
- Alerts are suspicious areas. Alerts may or may not be an accessibility error. The user should review these and fix if necessary.
- Rescan can be used once errors and alerts are fixed. This will allow the user to scan the page a second time and verify that all fixes were applied correctly.
Note: Files, videos, and audio will always be listed as alerts, as these require manual review with human eyes!
In the example below, we have 11 errors and 4 alerts.
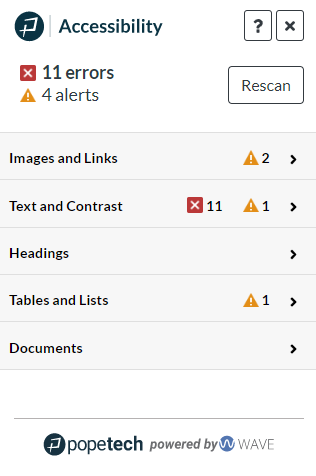
In the Pope Tech interface, results are organized by the following categories:
- Images and Links
- Text and Contrast
- Headings
- Tables and Lists
- Documents and Videos
Each of the categories can be expanded to show the errors or alerts. To view the content raising an error or alert:
- Select the arrow displayed next to any category name. Once you expand a category, Pope Tech will display fields grouping together issues within that category.
- Click any field to view detailed results and how to fix them.
- Click a particular result to highlight the indicated content within the Canvas editor, enabling you to fix that content.
This quick (42 second) video demonstrates the process described above:
Credit
Thanks to Tracy Schaelen of Southwestern College for originally developing content represented here, and to Liesl Boswell of the CCC Accessibility Center for some modifications and suggestions.