Canvas Start of the Semester Instructor Checklist
Create or Import your Content
Multiple ways to begin to build your class
Copy from another class in Canvas. Your access to classes you have previously taught in Canvas continues indefinitely.
Copy in an entire course or portions of one from Canvas Commons.
Create your content from scratch in Canvas
Review Assignments, Quizzes, and Discussions
- Verify activities and content in the course are published.
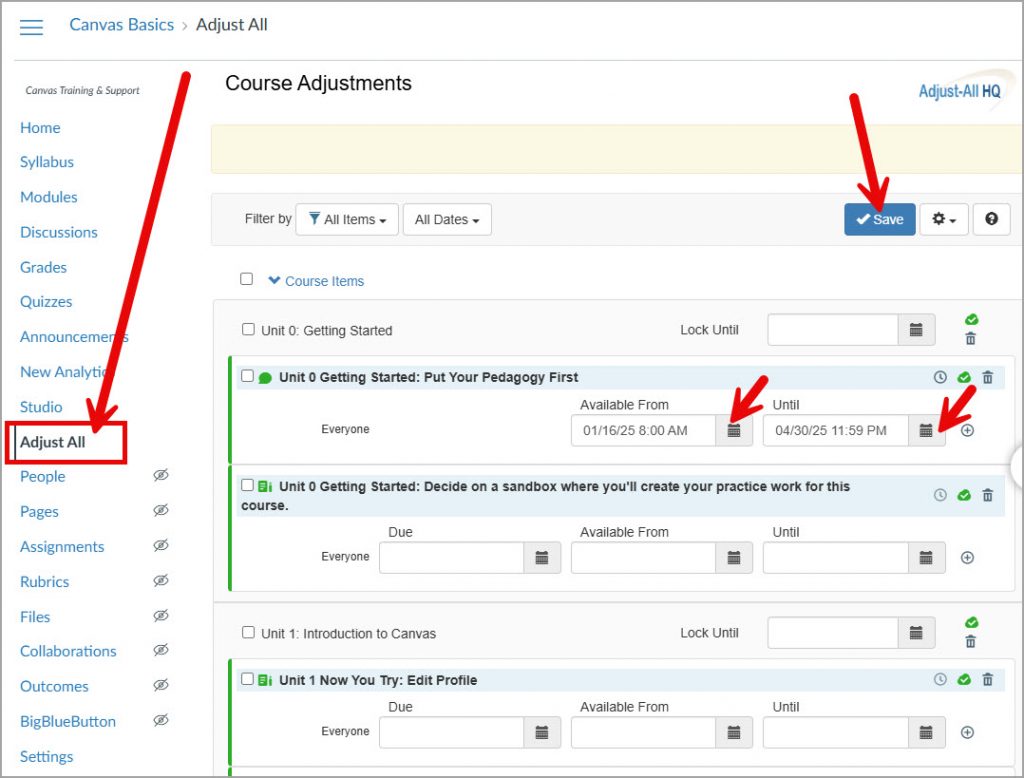
- Verify dates. Due dates are added to the calendar and the syllabus and serve as reminders to students. “Available from” and “Until” dates will unlock and lock the activity.
- Verify instructions are accurate and well formatted.
- Verify assignment submission types.
- Verify number of quiz attempts is correct.
- Verify assignment groups are set up correctly. See: How to use Assignment Index Page.
- Verify assignments are weighted correctly, if using a weighted grading system. See: How to Weight Assignment Groups.
- Verify discussions are ordered logically on Discussions list page.
- Verify Quiz “Options” are correct. See: Canvas Quiz Options.
Review Course Details
- Verify total points possible in the gradebook is correct. To verify Download the Gradebook or within Canvas Student View navigate to Grades.
- Review Syllabus for accuracy and compliance with the MiraCosta Syllabus Checklist
- Verify that links are valid and operational. See: How to Validate Links.
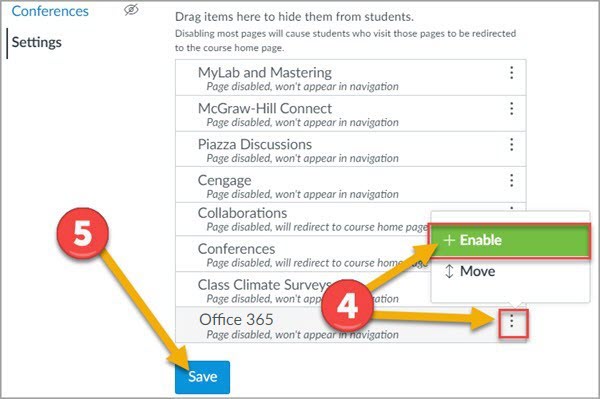
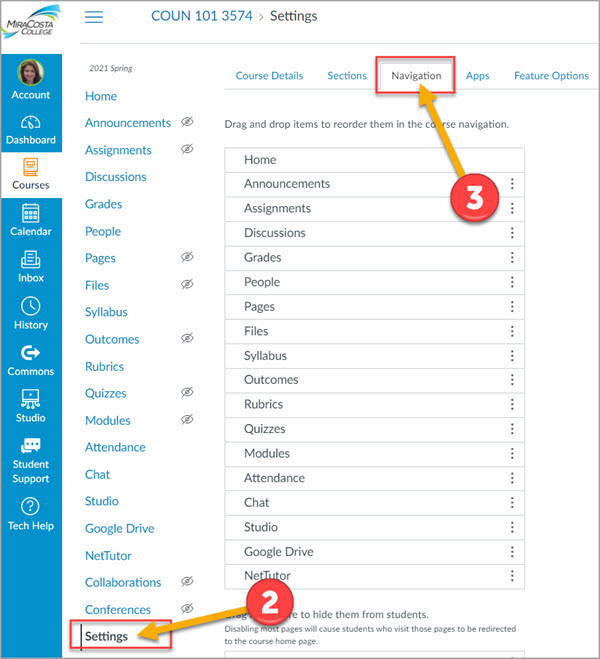
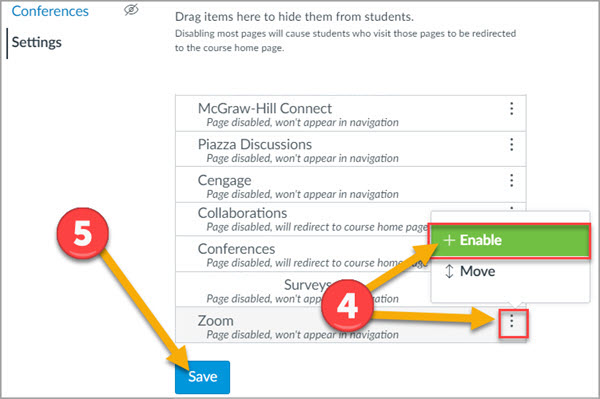
- Customize course navigation links. Keep only the links that are necessary. For example, in most cases the following should be hidden: Files, Pages, Outcomes, Conferences, and Collaborations. If using Modules you can hide even more links to simplify navigation for students. See: How to Reorder and Hide Course Navigation Links.
- Verify Modules are logically ordered and published, if using them.
- Verify Module “Lock until” dates are correct, if using them. See: How to Lock a Module.
- Verify Module requirements and prerequisites are set correctly, if using them. See: How to add Requirements to a Module and How to set Prerequisites for a Module.
- Verify the course home page is set up correctly. See: Home Page Layout Options and How to Change the Course Home Page.
- Use “Preview” option in each quiz to check for errors.
- Use “Student View” to review the entire course. See: How do I view a course as a test student and Canvas Student View vs MCC’s Sample Student Account.
- Verify that your course complies with accessibility standards. See: PopeTech and Canvas Accessibility.
Final Preparations
- Publish your course when you are ready for students to have access to it. This typically is on the morning of or before the official course start date. See: How do I publish a course? NOTE: Some faculty like to publish their courses well in advance of the start date, but only publish a handful of elements of the course (such as the syllabus). This allows enrolled students to “preview” the class.
- For online and hybrid classes, encourage students to attend a Student Online Academic Readiness (SOAR) workshop. You may also wish to share the Canvas Student Orientation to help any students who are new to Canvas to have a resource for learning the basics.
- Especially for online and hybrid classes, send an email to your students through your SURF Roster telling them how to access your course in Canvas.
Cautions
- Canvas email (Inbox/Conversation) messages will not be sent out if the course is unpublished. Send class messages from your SURF Roster instead, prior to publishing the course.
- Pay attention to the time stamp on anything you have placed a date on. 12:00 means the very first minute of the selected day. For end dates, it is often best to choose 11:59 PM to ensure you are setting it up on the correct date.