Adding NetTutor to Your Canvas Class
MiraCosta’s Learning Centers provide great online tutoring for all students, available in Canvas through the Student Support Hub. For subjects and times where local online tutoring may not be available, the next option is eTutoring through the Western eTutoring Consortium. A third option with even more subject and time availability is NetTutor, available through the California Virtual Campus (CVC-OEI).
Regardless of which online tutoring services may best benefit your students, these are recommended practices that faculty use to help more students benefit from tutoring:
- Mention online tutoring sources in your syllabus
- Embed reminders about use of tutoring within instructions for assignments
- Provide specific references to the opportunity for tutoring in your feedback/communication with students
- Normalize tutoring as an option that can support everyone
NetTutor provides support for just about any academic subject, up to 24×7 for the most popular subject matter, and can be made available via your Canvas course menu. The link opens an interface where students select their subject for NetTutor help, with no additional login required. Students can access both the STAR-CA tutoring consortium from California and the full complement of professional NetTutor tutors.
How can you help students take advantage of NetTutor?
First, please keep in mind that if your subject is supported by local MiraCosta Learning Center tutors, you should direct your students to that support primarily. If you do want your students to consider NetTutor support:
- Add NetTutor to your course menu (see below)
- Share NetTutor’s overview video and/or 1-page student guide (PDF)
Also with NetTutor, each instructor may specify “Rules of Engagement” that inform tutors about the approach and resources you would like them to use when working with your students. If you would like to do this, contact Jim Julius for more information.
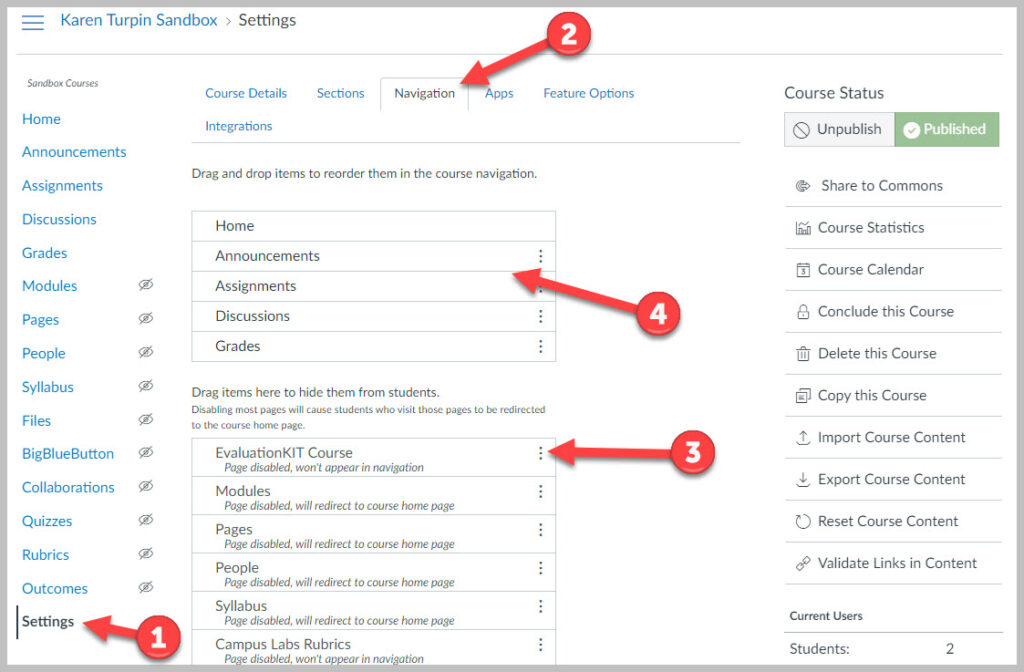
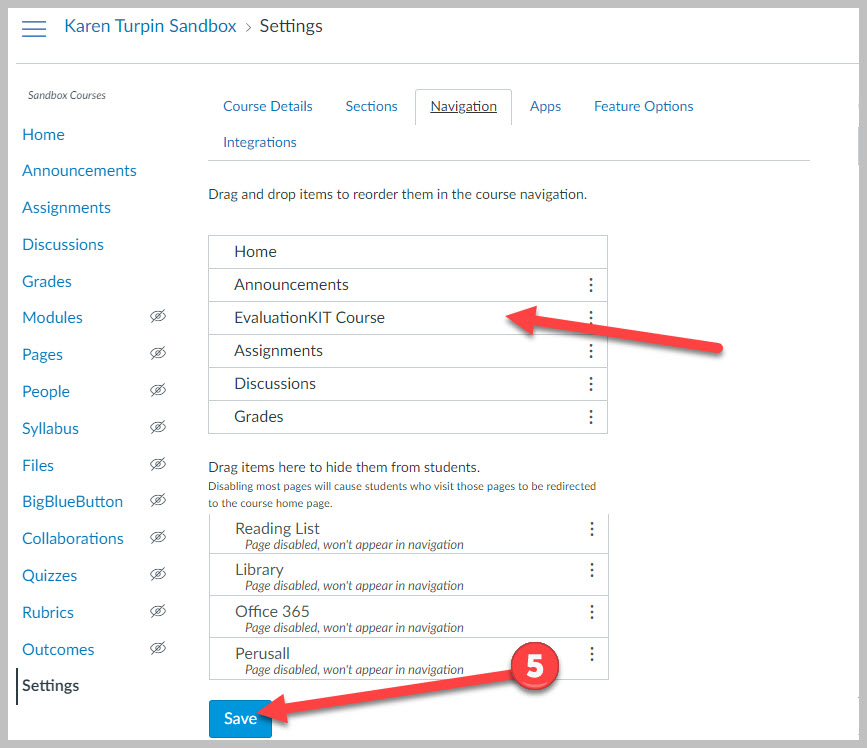
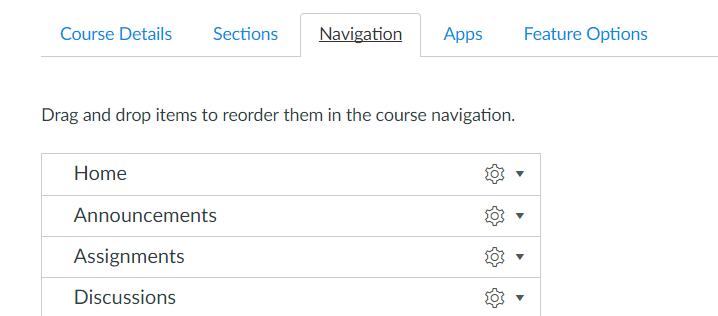
Adding NetTutor to your Canvas course menu
Once you add NetTutor to your course menu following the directions below, click the NetTutor link to verify that your subject is available.
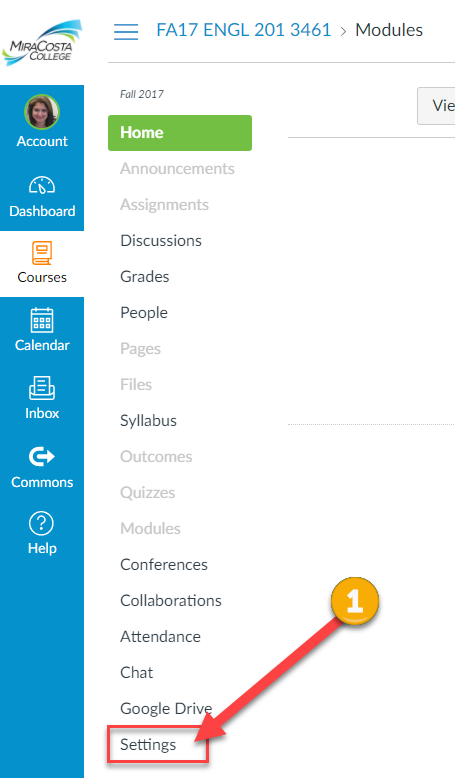
1- Click Settings at the bottom of your course menu
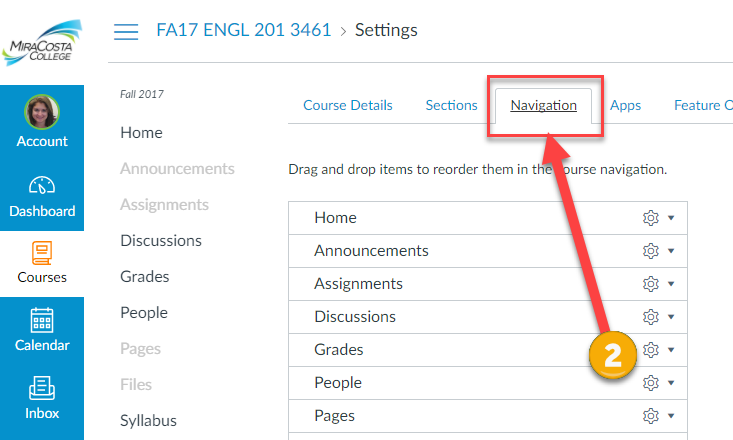
2- Click the Navigation tab
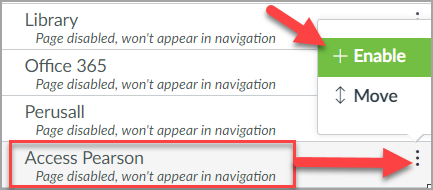
3- Click the gear icon to the right of NetTutor
4- Select +Enable
5- Click the Save button
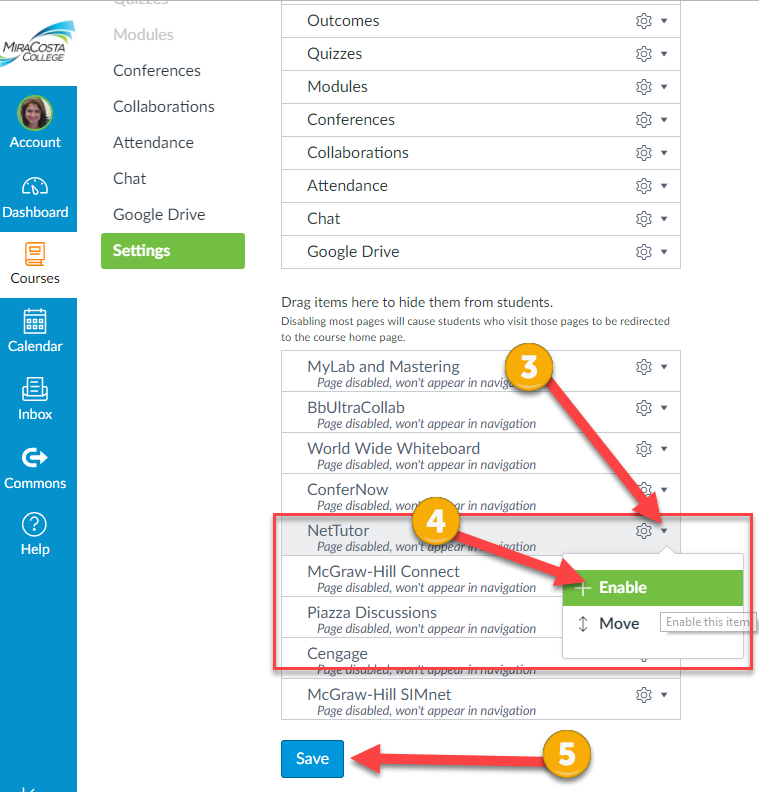
A NetTutor link now appears in your course menu.