Course Visibility Options
Should I make my Canvas course Public, Institution, or keep as the default Course? This guide explains the several options for privacy and visibility of courses.
- Download: Course Visibility Options (PDF Version)

Should I make my Canvas course Public, Institution, or keep as the default Course? This guide explains the several options for privacy and visibility of courses.
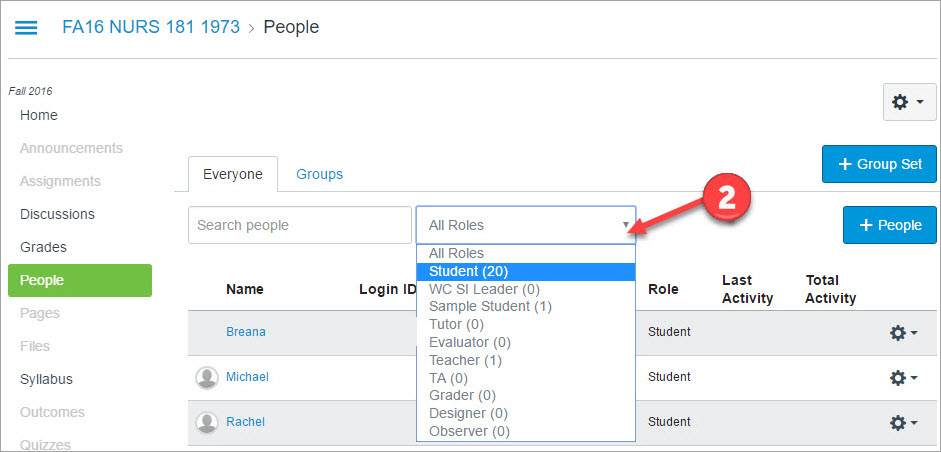
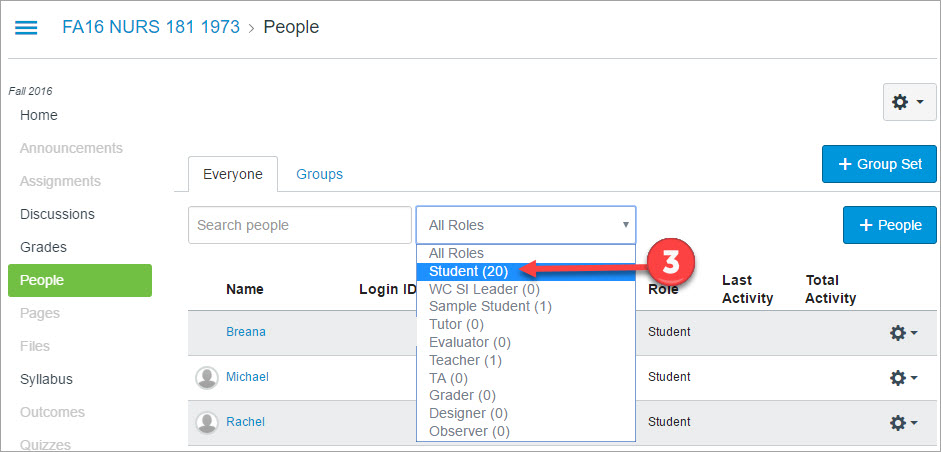
By default the People tool will display all users enrolled in your Canvas course. You can filter the users by role to obtain the count of users in that role as well as Last Activity and Total Activity.
From within a Canvas Course:
It is important to verify that all links are working throughout a course. The course link validator tool can help make this task easy for faculty designing and teaching courses.
The course link validator tool searches through course content and returns invalid or unresponsive external links in both published and unpublished content.
The link validator also includes deleted links. Deleted links are links that are still in the course, but their linked content has been deleted (such as a course files or pages).
Note: Some links flagged as unresponsive are inaccessible by Canvas servers and will still work for students.
From within a Canvas Course
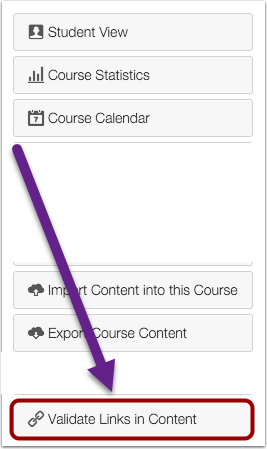
For additional directions refer to the Canvas guide: How do I validate links in a course?
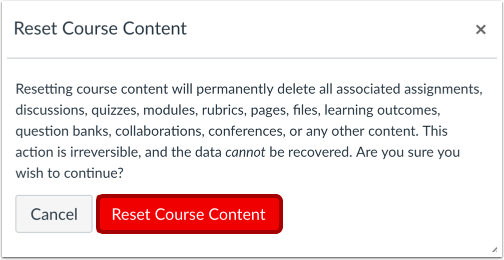
From time to time, you may want to delete all of the content in a Canvas course site. This is most typically needed early in the course building process. For example, after importing content from another course, you may realize that you imported from the wrong course. The directions described below will delete all content from your course site, but leave the course roster intact.
WARNING: This step deletes all existing content from your course. Take steps to preserve any content you want to keep (for example, copy and paste to a Word doc, copy select course elements to a sandbox course, import the course into another empty shell, etc.) before proceeding. DO NOT complete these steps in a current term course that is currently in process!
Canvas Guide: How do I reset course content?
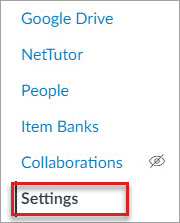
1. Navigate to the course with the content you wish to delete.
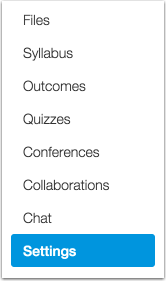
2. From the course navigation menu, click the Settings link.
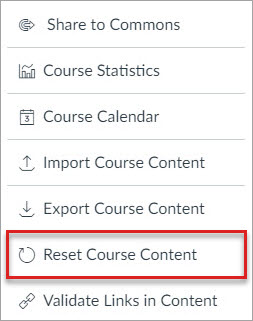
3. In the sidebar, click the Reset Course Content link.
4. Click the Reset Course Content button.
A completely new course shell with a new ID (the number following “https://miracosta.instructure.com/courses/…”) will be generated. All users previously enrolled in the course will remain enrolled.
If for some reason you reset your course and it was a mistake report it as soon as possible. We have Test and Beta instances of Canvas we may be able to refer to for the content and/or to restore the original course.
Contact Karen Turpin, Instructional Technology Specialist at kturpin@miracosta.edu or Canvas Faculty Support 24/7 at 1- 833-345-2890 for assistance.
The following steps will to assist you with changing your sample student account password. Passwords may be changed throughout the year, passwords are required to be updated a year from the last reset Follow these directions after your employee password is reset, or when you need to reset the password for security purposes.
Changing the Canvas faculty student account password is the exact same process as regular login (example: jdoe) but login with this account’s login ID (example: jdoe-student ).