LabArchives is an electronic lab notebook that can help instructors and learners better manage, share, and publish research notes, data, protocols, and related documents.
MiraCosta College’s institutional license gives all MiraCosta College students, staff, and faculty free access to LabArchives. Log on with your MCC login and password to access LabArchives. Faculty can also integrate Lab Archives with Canvas.
Features of LabArchives
Share and collaborate on notebooks by multiple parties.
Store multiple file types, including images, GraphPad Prism, FlowJo, PDFs, and Office documents
Create templates, forms, and custom applications for routine laboratory tasks.
Instructors can provide feedback on students’ notebooks.
Storage of every version of every file, recording the date, time, and username.
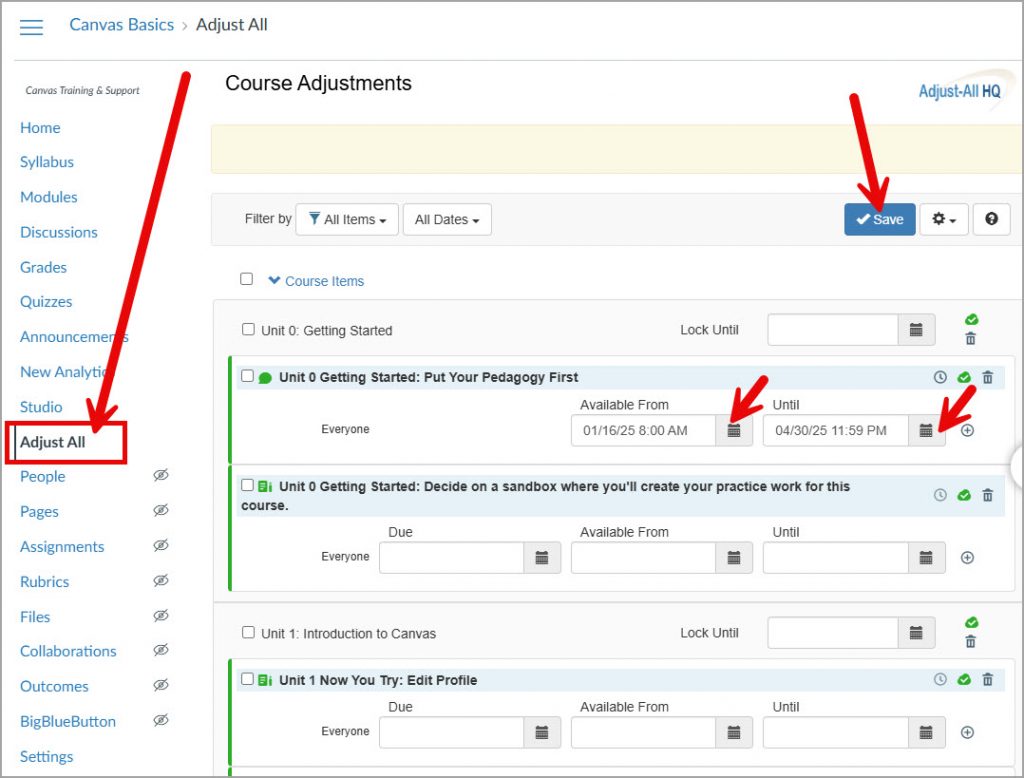
Adjust-All is a simple Canvas tool that enables you to change all course item due dates and announcement publication dates in one place, rather than having to access each item individually.
The first time you use Adjust-All, you’ll need to click the blue Authorize button – it’s fine 😊
This tool is only available to faculty – students won’t see it in your course menu.
There are a few other things you can do with Adjust-All. Click the gear icon at top right to see options for bulk adjustments to dates or publishing status.
Respondus is a quiz authoring and management tool that allows instructors to create exams, quizzes, and surveys offline that can then be published directly to Canvas. Test questions can be uploaded from a text file, rich text file, or Word document. Existing Canvas tests can be downloaded, saved, and printed. In the latest release of Respondus, you can now publish directly to “New Quizzes” within a Canvas course.
MiraCosta College has a campus-wide license for the Respondus software allowing installation of the software on any on campus computer or faculty personal computer. Respondus is a Windows application. For MAC users Respondus is available via VMWare.
Download Respondus – You will need your MiraCosta College login and password to obtain the current year installation password.
MiraCosta’s Canvas system may be accessed at miracosta.instructure.com – faculty and students log in with their SURF username and password. You’ll also find a link to log into Canvas at the top right hand side of the campus website www.miracosta.edu. See below for many great resources to help you learn to use Canvas, and earn MiraCosta Flex credit along the way.
What does a Canvas class look like? Well, there are a number of approaches to designing a class in Canvas. Check out some short videos by MiraCosta faculty. And then go behind the scenes – in Canvas – to learn more!
Canvas Student Orientation – this open Canvas course can also be a good way for faculty to introduce themselves to Canvas from the student perspective. Faculty are also welcome to link directly to this resource within their own Canvas classes to help their students learn key features of Canvas.
Flex Credit is available for time spent engaging with any of the above resources. This is a pre-approved activity (in the Other Activities category Conferences and Presentations).
And often starting with a Google search is the quickest path to finding something really useful!
Again, Flex Credit is available for time spent engaging with any of the above resources.
Canvas Faculty and Student Support
MiraCosta’s Online Education department provides support for faculty using Canvas, and MiraCosta’s ITS Help Desk provides support for students in Canvas classes.
When local support is unavailable, including evenings and weekends, Canvas provides technical support for faculty and students at the following phone numbers.
Faculty: 1-833-345-2890 Students: 1-877-884-1673
Canvas has excellent “Getting Started” guides for faculty and for students. See above for more faculty training resources.
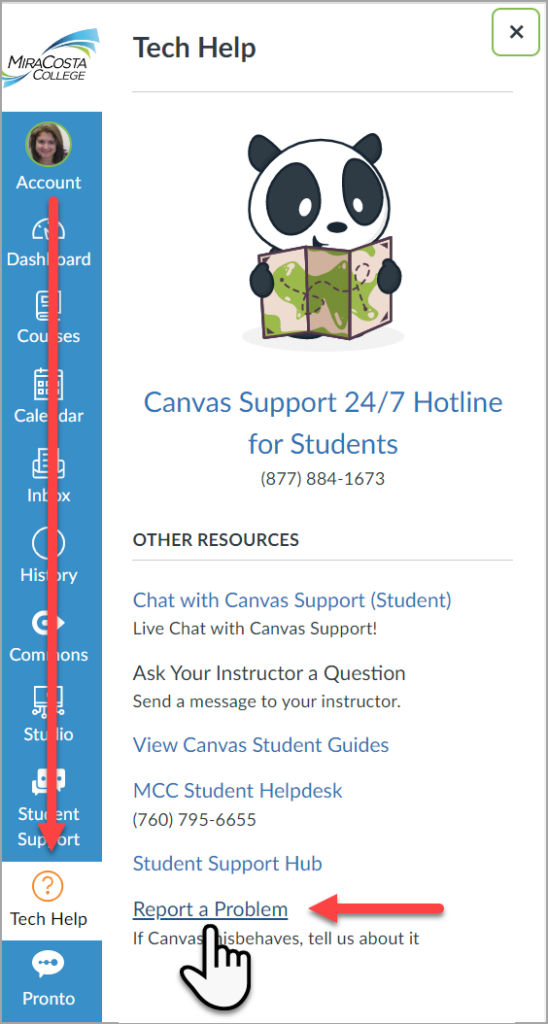
Faculty and students can also create a helpdesk ticket for support from within Canvas by clicking on the Tech Help icon and then selecting Report a Problem.
Many other LTI tools (“Apps”) are available – some have been made available institutionally and you can see those in the Navigation tab of Course Settings; others can be enabled by faculty individually; you can see those in the Apps tab of Course Settings. See the Canvas Guide on the App Center to learn more.
Workarounds
Canvas does not have a dedicated journaling tool. It is possible to use Canvas tools to provide students with a place to submit their writings or reflections at various points throughout the semester. This is done by creating a series of assignments within the same assignment group.
MiraCosta College took on a comprehensive Course Management System evaluation in spring 2016 that led to the selection of Canvas. The college then transitioned away from Blackboard and Moodle and to Canvas during 2016-17 and 2017-18. Starting in summer 2018, Canvas is the sole supported course management system for MiraCosta classes.
One of MiraCosta’s early Canvas adopters, music professor Christy Coobatis, says this about using Canvas in spring 2017:
Has been an extremely successful semester because of it!
Both students and I loved the program.
I have more and clearer communication than ever before!
Another, Adult High School professor Julie Cord, says:
I am in LOVE with Canvas and I truly feel it has helped support my students and my teaching already in very substantial ways.
Canvas Studio (Recording, 57 minutes) – 1/17/2023 workshop by Nadia Khan and Karen Turpin – Additional Resource:Presentation Slides
Studio is a video tool integrated inside of Canvas, available to all faculty and students.
With Studio:
Faculty and students can easily record webcam and screencast video within Canvas
Faculty and students can create and manage a library of videos for use in Canvas (and to share outside of Canvas)
Faculty can create discussion activities that are based on video (discussion comments are tied to specific points in the video)
Faculty get data on student viewing of video
Faculty can add quiz questions into videos; students respond while watching the video; results go directly into the gradebook
Students can submit video assignments; faculty can provide feedback directly on specific moments in the video
Videos can be automatically captioned and the captions can be easily edited
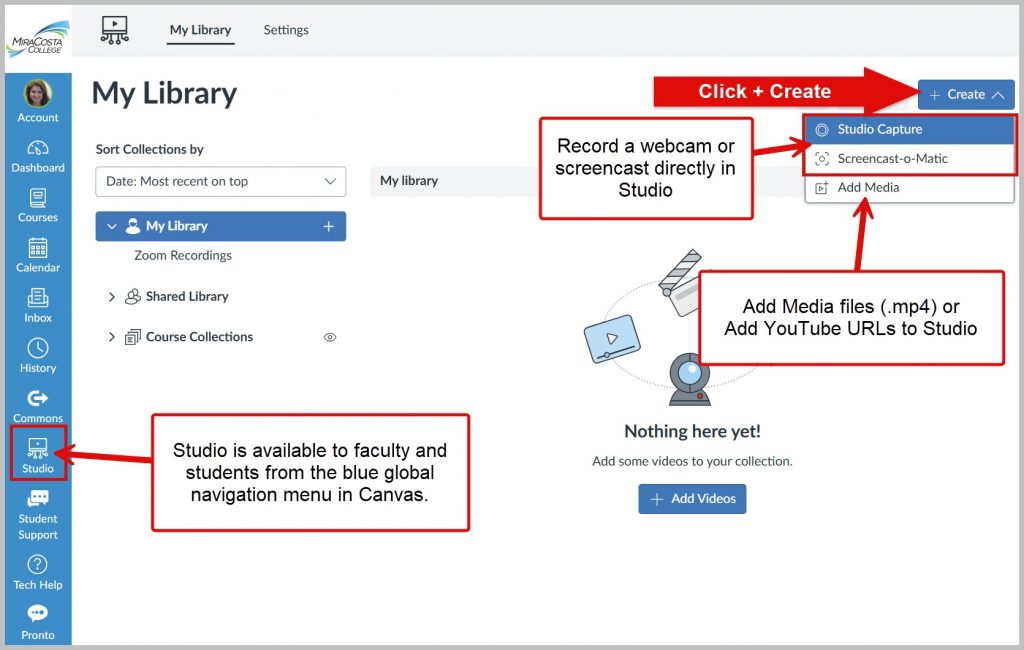
Studio is available to faculty and students from the blue global navigation bar in MiraCosta Canvas.
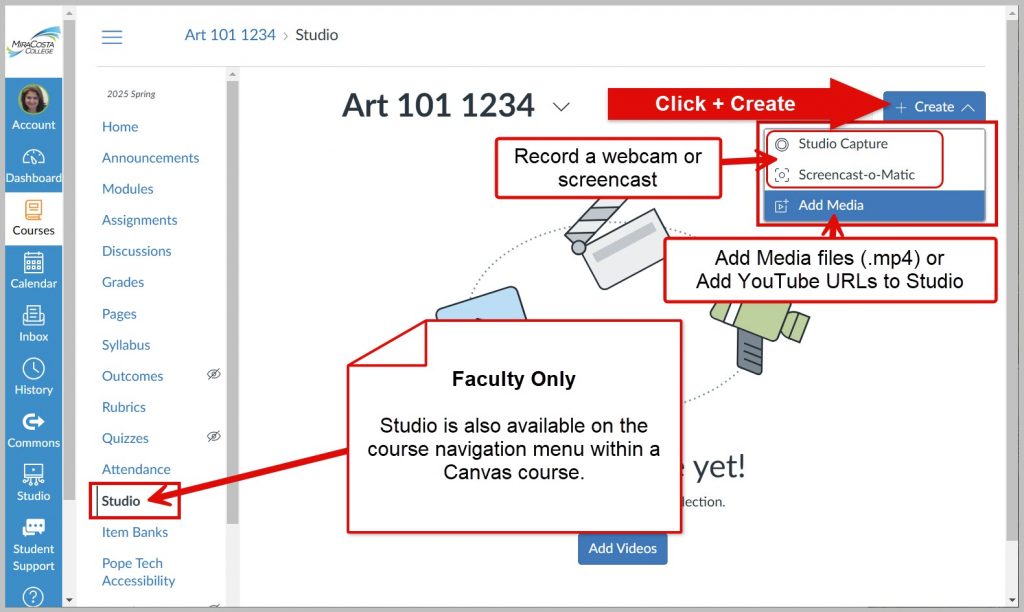
Studio is also available to faculty only on the navigation menu within a MiraCosta Canvas course to RECORD or ADD video content.
Within the Canvas Rich Content Editor, faculty and students can select Studio from the second row of icons to add a Studio video they’ve previously recorded, or to create and use a webcam or screencast video right there.
Canvas Studio supports an integration with Zoom that allows Zoom to automatically upload recorded meetings into Studio. Here is how you can authorize the Studio Zoom integration in your Canvas Studio Settings.