TidyUP is available within a Canvas course to help quickly identify and clean up course content. Identifying and deleting extra files, folders, pages, or assignments that are no longer in use will make your course easier to manage and more usable for everyone.
Note: TidyUp does not identify files that are being used in Question Banks
Enable the TidyUp tool in a Canvas course
Start within your Canvas course, click on Settings at the bottom of the course navigation menu.
Click on the Navigation tab.
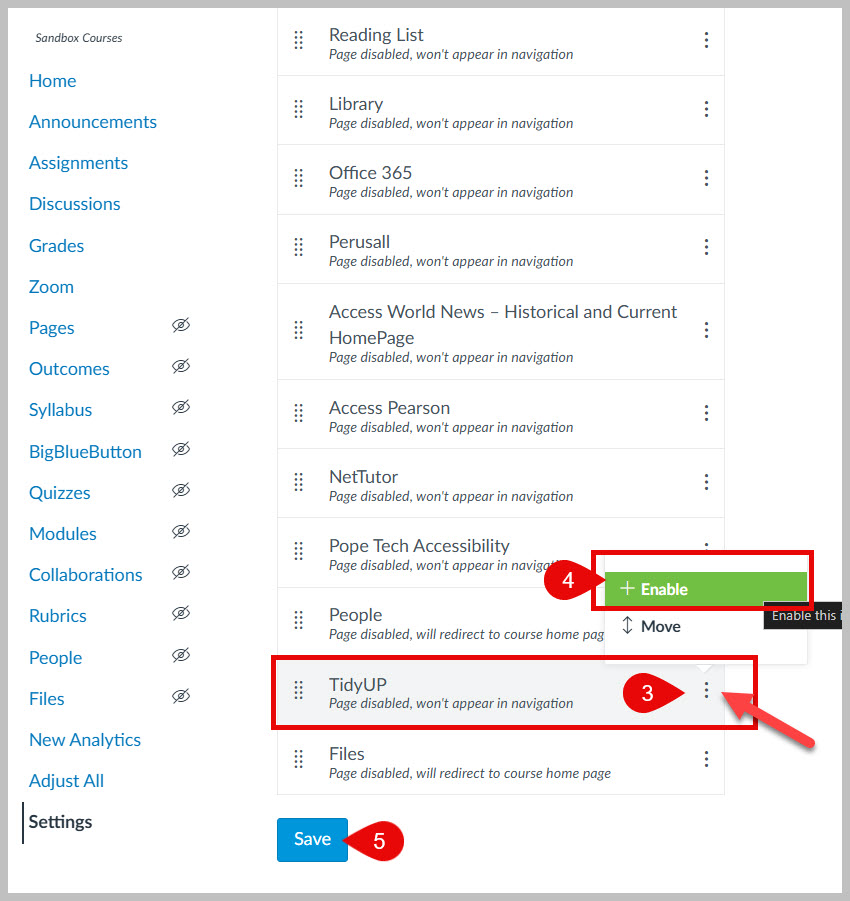
3. Click on the 3 dots to the right of TidyUp.
4. Select + Enable.
5. Click Save.
The TidyUP tool will now be available on your course navigation menu near the bottom of the list.
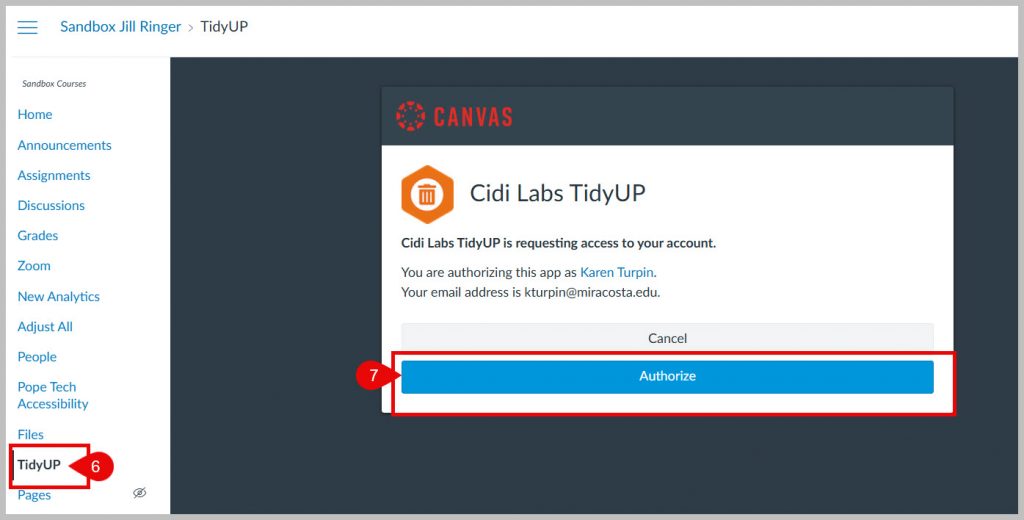
6. Click the TidyUP link.
7. Click the Authorize button the first time you launch the tool.
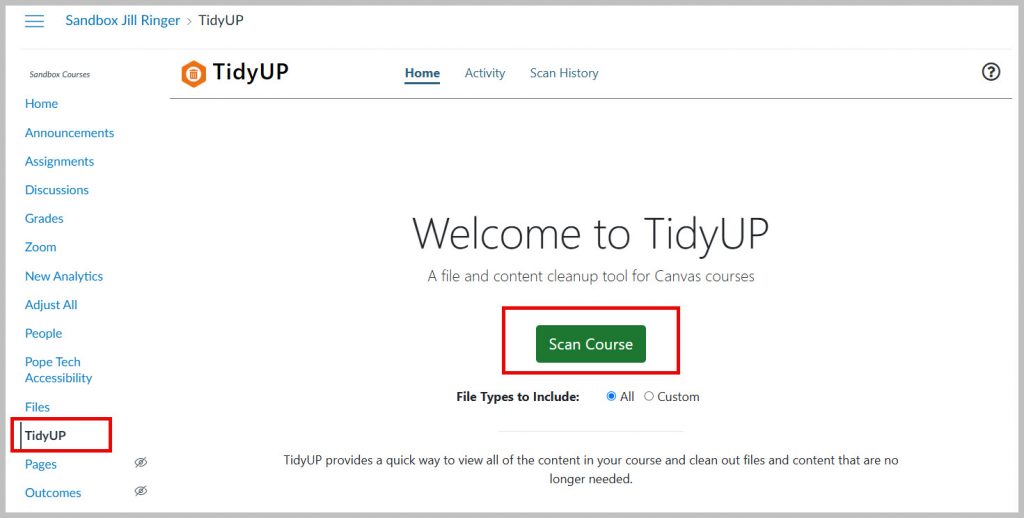
You are now ready to use the TidyUp tool. Click the Scan Course button to get started.
DesignPLUS is a user-friendly Canvas plug-in that helps you build polished, engaging, and accessible courses efficiently. DesignPLUS is licensed for all faculty at MiraCosta College using Canvas.
DesignPLUS includes four primary tools:
Sidebar – a suite of rich content editor tools that help you create organized, accessible, engaging, and visually polished content in Canvas with ease.
QuickStart Wizard – design tools available when you are editing new content in Canvas (a new page, assignment, discussion, etc) to quickly add visual design elements or adopt existing templates.
Cidi Labs Multi-Tool – a time-saving tool that lets you quickly set up an engaging home page and create accessible templates for reuse across Canvas. It also can help you quickly build repeatable, consistent module structures. You can also adjust due dates and delay announcements using this tool.
Upload/Embed Image Tool – a tool that enables you to discover, add, edit, and place course images in Canvas
DesignPLUS Sidebar
When you are editing Canvas content, select the sidebar icon at top right to launch the Sidebar tool, which will then appear on the right. The Sidebar tool includes many enhancements to the Rich Content Editor in Canvas, enabling you to easily add a variety of attractive and engaging content elements.
Getting Started with the Sidebar
Learn more about the DesignPLUS Sidebar (Tap to open a list of resources).
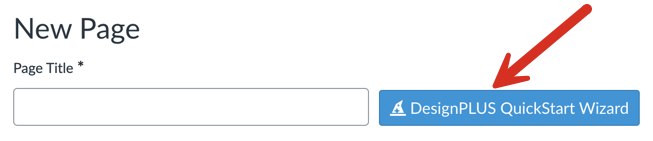
The QuickStart Wizard button appears when you open a new page, assignment, or syllabus for editing. Activating the Wizard gives you access to templates for the entire page, or pre-defined content blocks of different types to help you customize the page.
Getting Started with the QuickStart Wizard
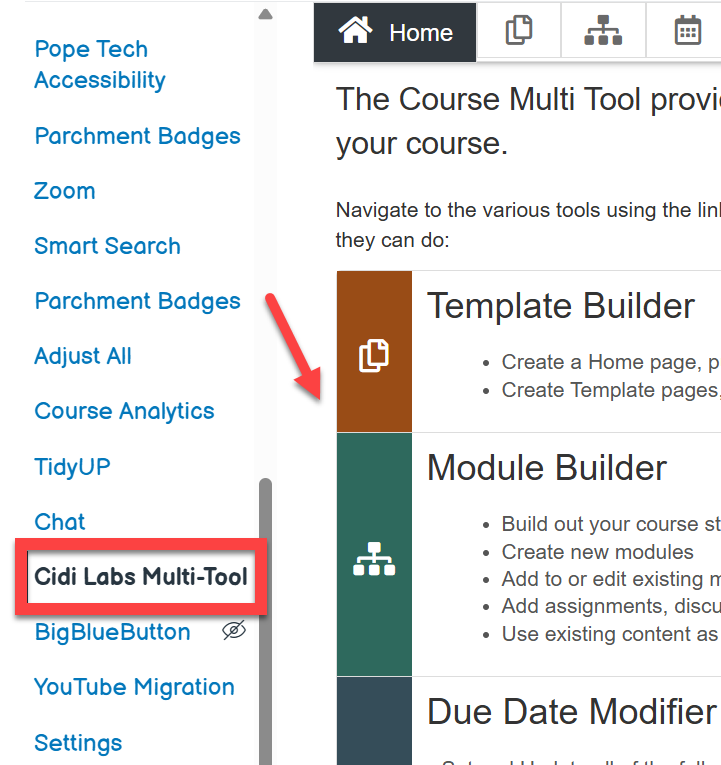
Cidi Labs Multi-Tool
The Cidi Labs Multi-Tool shows up in the left course navigation menu of your Canvas course. You will be asked to authorize Cidi Labs to access your Canvas account. Once the Multi-Tool is set up, you can select from a variety of tools to help rapidly develop and update your courses. Watch the Multi-Tool orientation video to learn more about what it can do for you.
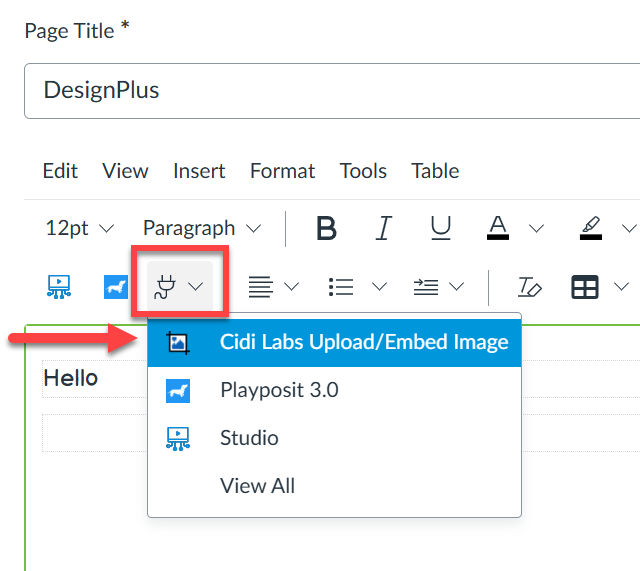
This tool enables you to manage course images directly in Canvas. Upload, crop, resize, and embed images anywhere in your course, or quickly add free, high-quality images from Pexels and Unsplash. To access the Upload/Embed Image (U/EI) tool, go to apps through the Rich Content Editor (RCE). The first time you access the tool, you will be asked to authorize Cidilabs to access Canvas so this tool is available for you. Watch the Upload/Embed Image orientation video to learn how this tool works.
Visit the Canvas Release Notes/Upcoming Changes page within the Canvas Community. This page is updated by Instructure and is the central location for communicating all Canvas’s significant upcoming changes. Check the Canvas System Status Updates for real time updates about existing features within Canvas.
Verify activities and content in the course are published.
Verify dates. Due dates are added to the calendar and the syllabus and serve as reminders to students. “Available from” and “Until” dates will unlock and lock the activity.
Verify instructions are accurate and well formatted.
Customize course navigation links. Keep only the links that are necessary. For example, in most cases the following should be hidden: Files, Pages, Outcomes, Conferences, and Collaborations. If using Modules you can hide even more links to simplify navigation for students. See: How to Reorder and Hide Course Navigation Links.
Verify Modules are logically ordered and published, if using them.
Verify Module “Lock until” dates are correct, if using them. See: How to Lock a Module.
Publish your course when you are ready for students to have access to it. This typically is on the morning of or before the official course start date. See: How do I publish a course? NOTE: Some faculty like to publish their courses well in advance of the start date, but only publish a handful of elements of the course (such as the syllabus). This allows enrolled students to “preview” the class.
Especially for online and hybrid classes, send an email to your students through your SURF Roster telling them how to access your course in Canvas.
Cautions
Canvas email (Inbox/Conversation) messages will not be sent out if the course is unpublished. Send class messages from your SURF Roster instead, prior to publishing the course.
Pay attention to the time stamp on anything you have placed a date on. 12:00 means the very first minute of the selected day. For end dates, it is often best to choose 11:59 PM to ensure you are setting it up on the correct date.
WeVideo (formerly PlayPosit) is an interactive video learning tool that is fully integrated with MiraCosta College’s Canvas. WeVideo allows instructors to create activities using videos from Canvas Studio, 3C Media, YouTube, Vimeo, or other video sources. WeVideo now includes access for instructors to the WeVideo’s Multimedia tool to create instructional videos, podcasts or set up assignments for learners to demonstrate learning through media.
Create an Assignment in Canvas with WeVideo interactivity?
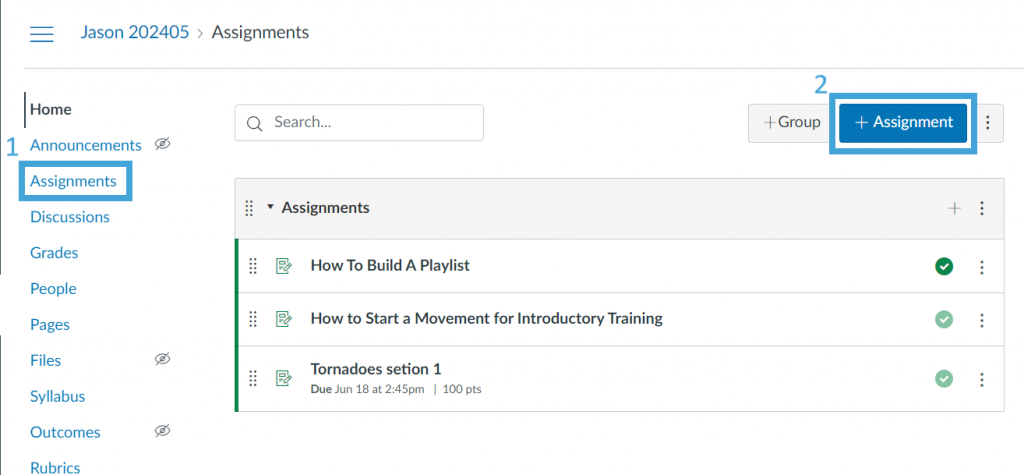
In your Canvas course, click on Assignments
Then + Assignment
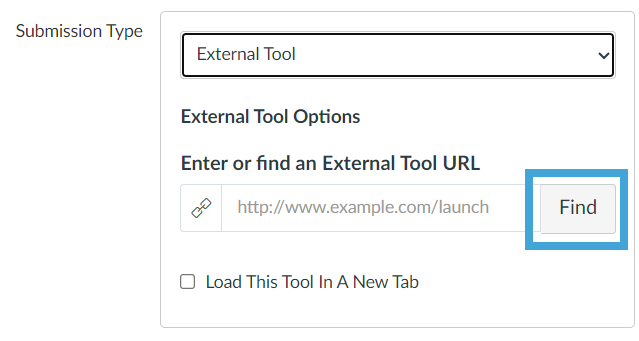
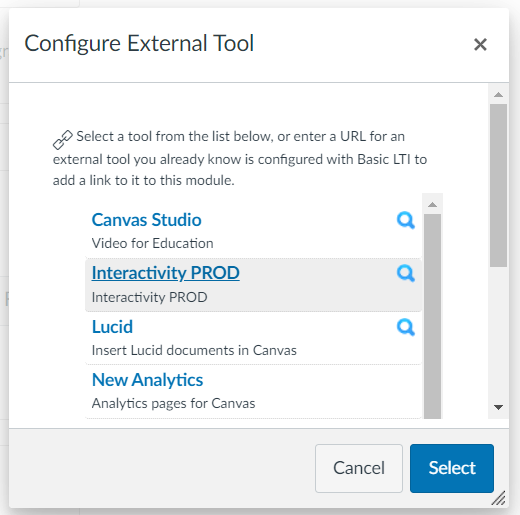
3. Enter the information for the assignment, change the submission type to External Tool, and click Find.
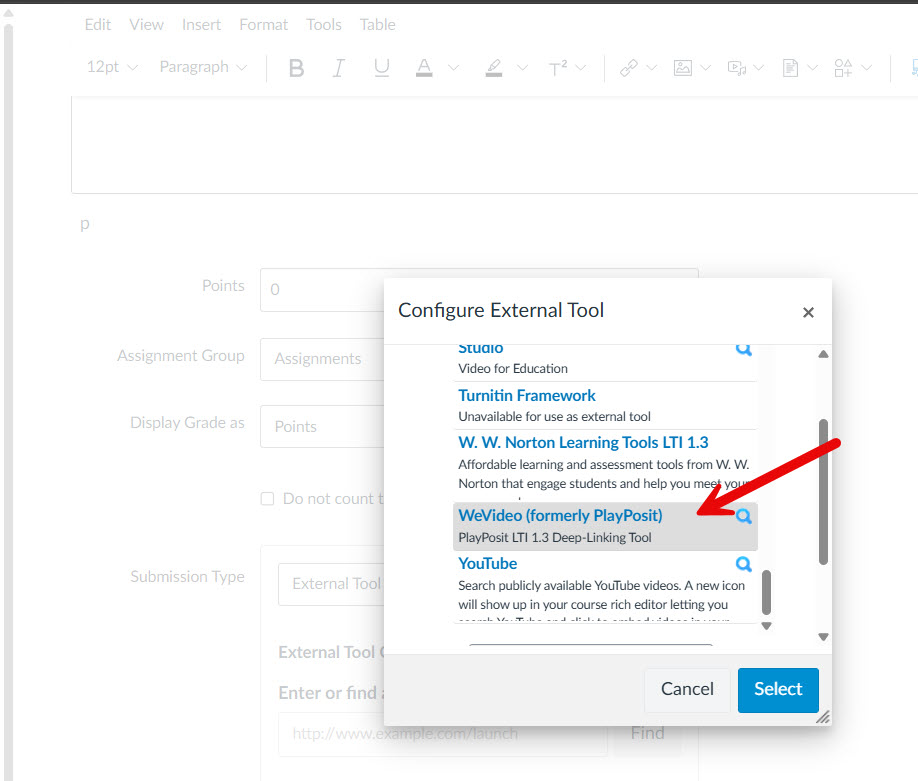
4. Select the WeVideo (formerly PlayPosit) Interactivity tool from the list.
5. Click the Set Link button on the gray screen.
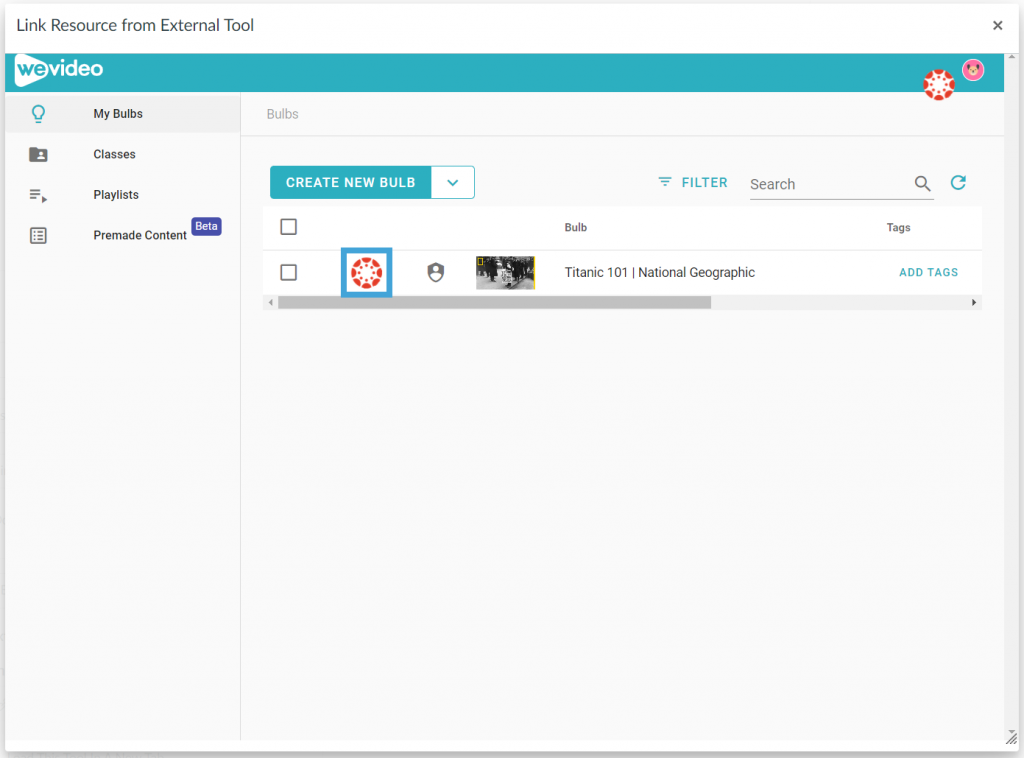
6. Click on the Canvas icon in front of the desired interactive video or playlist and click Link to assign it.
If you do not have an interactive video in your account yet, please follow the steps in this article to create your first interactive video.
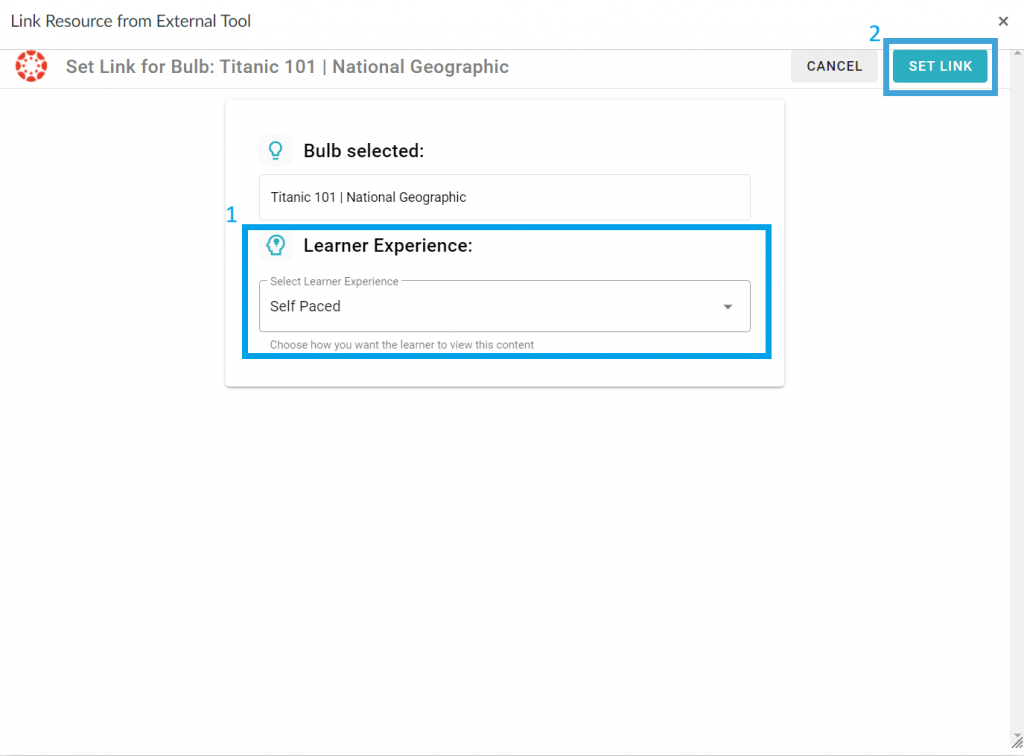
7. Select the learner experience to be Self Paced or Live Broadcast, then click Set Link.
8. Click Select to complete the process.
Adjust the grading and due date for the assignment in Canvas. Please note that if you would like to have the grades synced, the points for the assignment in Canvas must be greater than 0.
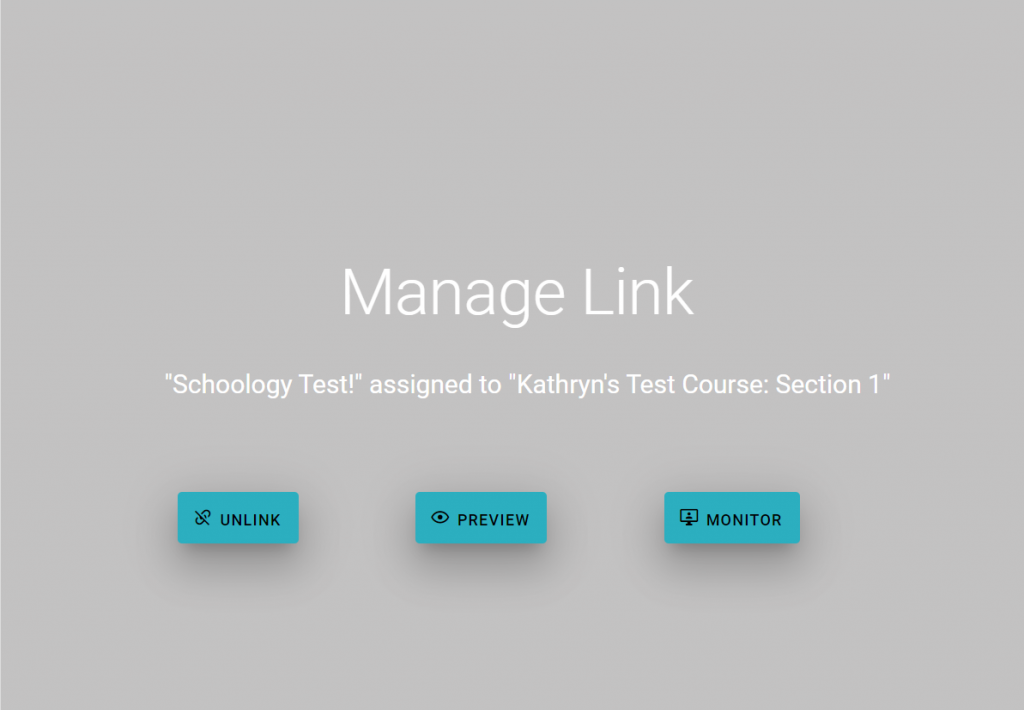
After the content is linked, you will see the following window when launching the assignment as an instructor. There will be three options:
Unlink: unlink the content from this assignment so you can assign it to another assignment in this class if needed. Once the content is unlinked, the learners’ grades will be archived and not visible from the monitor page. They will need to complete the activity again in the new assignment to gain their grades.
Preview: Preview the content that is linked to this assignment.
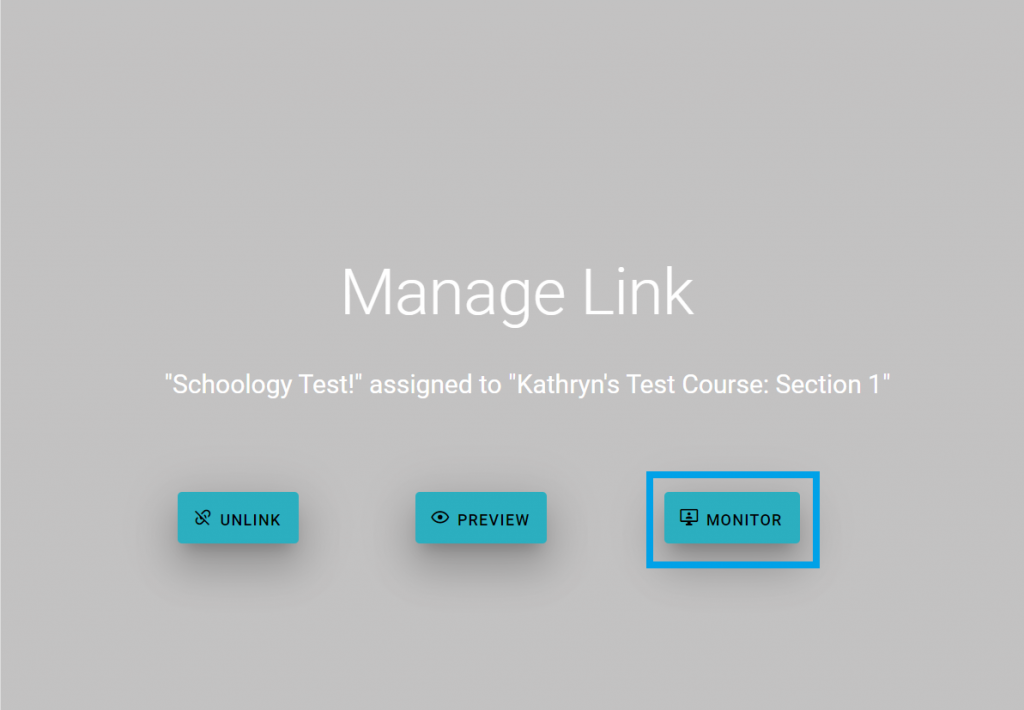
Monitor: Open the monitor page for this assignment for you to review and adjust learners’ grades. Please see the next section for more information.
Monitor Learners’ Grades from Canvas
Click the Monitor button on the gray window to launch the monitor page.
On the monitor page, you can see learners’ names, responses to each question, and their grades.
If you need to update learners’ grades or provide points to manually graded questions, click the response and assign points to it.
After grading, please ensure that you click the Sync Grades button at the top to sync the most updated grades to the Canvas grade book.