Google Slides is a popular tool for creating slide show presentations. Below are some topics that support accessibility in Google Slides.
Headings & Structure
Images
Hyperlinks
Exporting to PowerPoint
Structure
The structure of the content can provide an organizational and navigational framework for individuals to understand the informational hierarchy and relationship between different sections of content. These structural elements can help determine the organization and logical reading order of the presentation for an individual using assistive technologies. Google Slides provides three features, which assist with content structure: Slide Themes, Slide Layouts, and Slide Title.
More information can be found on the Structure page.
Slide Title
The Slide Title is used to provide a heading for the slide’s content. Slide titles should be unique and descriptive to help users navigate to specific content on the slides.
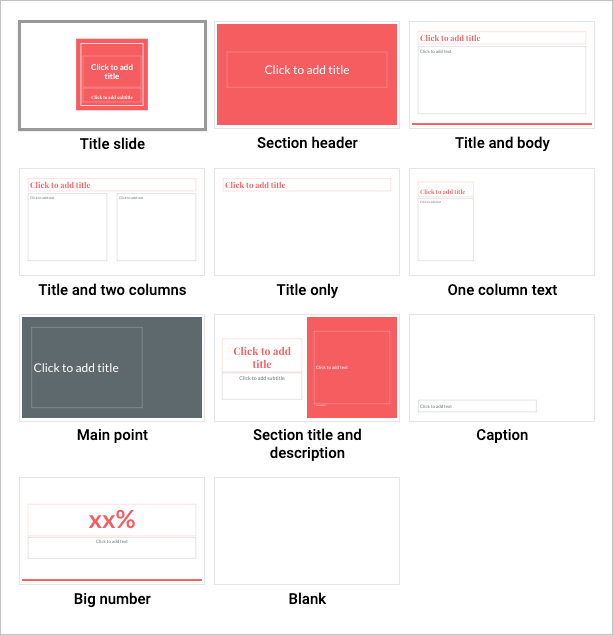
Slide Layout
The Slide Layout provides templates with content regions in a predefined layout. Using a predefined slide layout will help ensure that the slide has the correct heading structure, numbered and bulleted list styles, and reading order.
In the toolbar, select Layout. Select the desired layout.
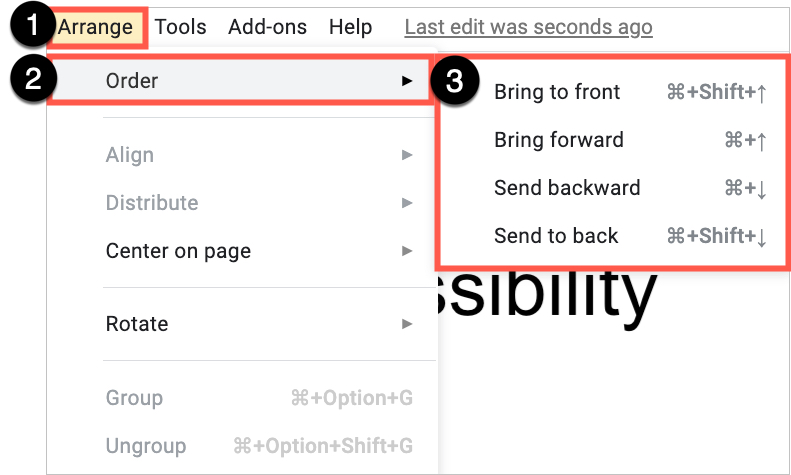
Managing Reading Order
If creating separate text boxes that are not part of a preset layout, any of this content may not be in the correct reading order. When placing content manually onto a blank slide, you will need to assess and manage the reading order using the Arrange button in the toolbar.
Tab through the slide to see the reading order.
To change the reading order, select on Arrange > Order.
Send Backward will raise the element to a higher reading order (ex., from 3 to 2).
Bring Forward will lower the element to a lower reading order (ex., from 3 to 4).
Test the reading order with the Tab key again.
Although most Slide Layouts and Slide Themes contain slide titles – you may see a blank slide. To provide logical reading order, please note that every slide should have a Slide Title.
Images
Images that support the content require a text description (also called “alternate text”) to communicate the purpose and/or content of the image. Image descriptions should be short and communicate the main purpose of the image. If a longer description of the image is necessary to fully explain its content, consider alternate strategies outlined on the Images page.
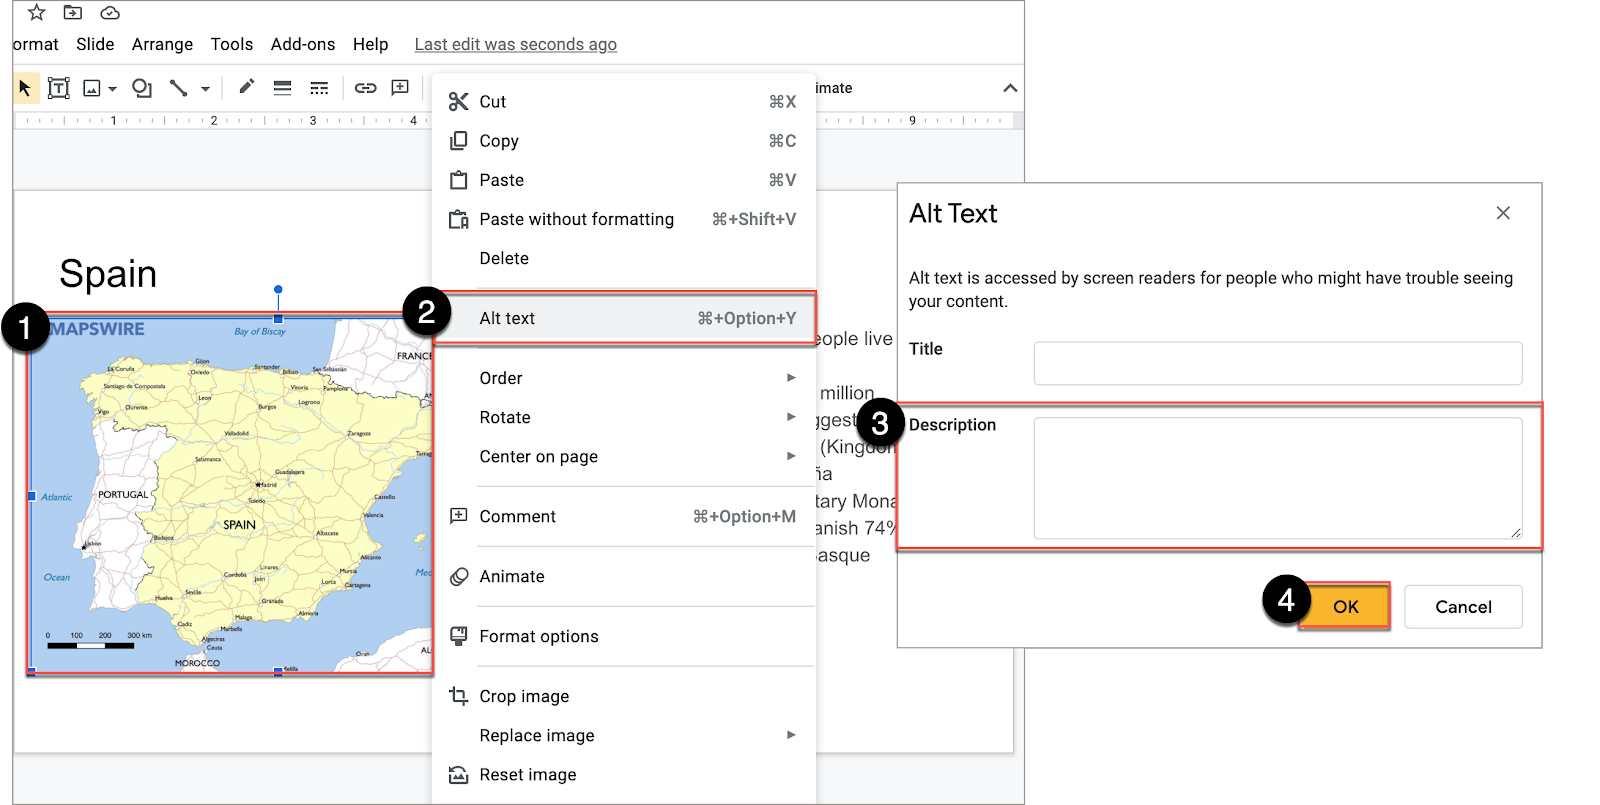
To add the alternate text:
Select the image. Right-click.
Select Alt text.
In the Alt Text window, write the alt text in the Description field.
Selec OK.
For additional guidance on writing effective text descriptions (i.e., alt text), please review the Images page.
Hyperlinks
Documents containing hyperlinks to websites or other online resources can be improved by including hyperlink text that is understood by the reader. For instance, using the full hyperlink URL may not make sense to the reader without some context.
Highlight the descriptive word or phrase that will become the hyperlink.
Select InsertLink button in the rich content editor.
Write the hyperlink in the Link field and select Apply.
Exporting to Other Formats
Export to PowerPoint
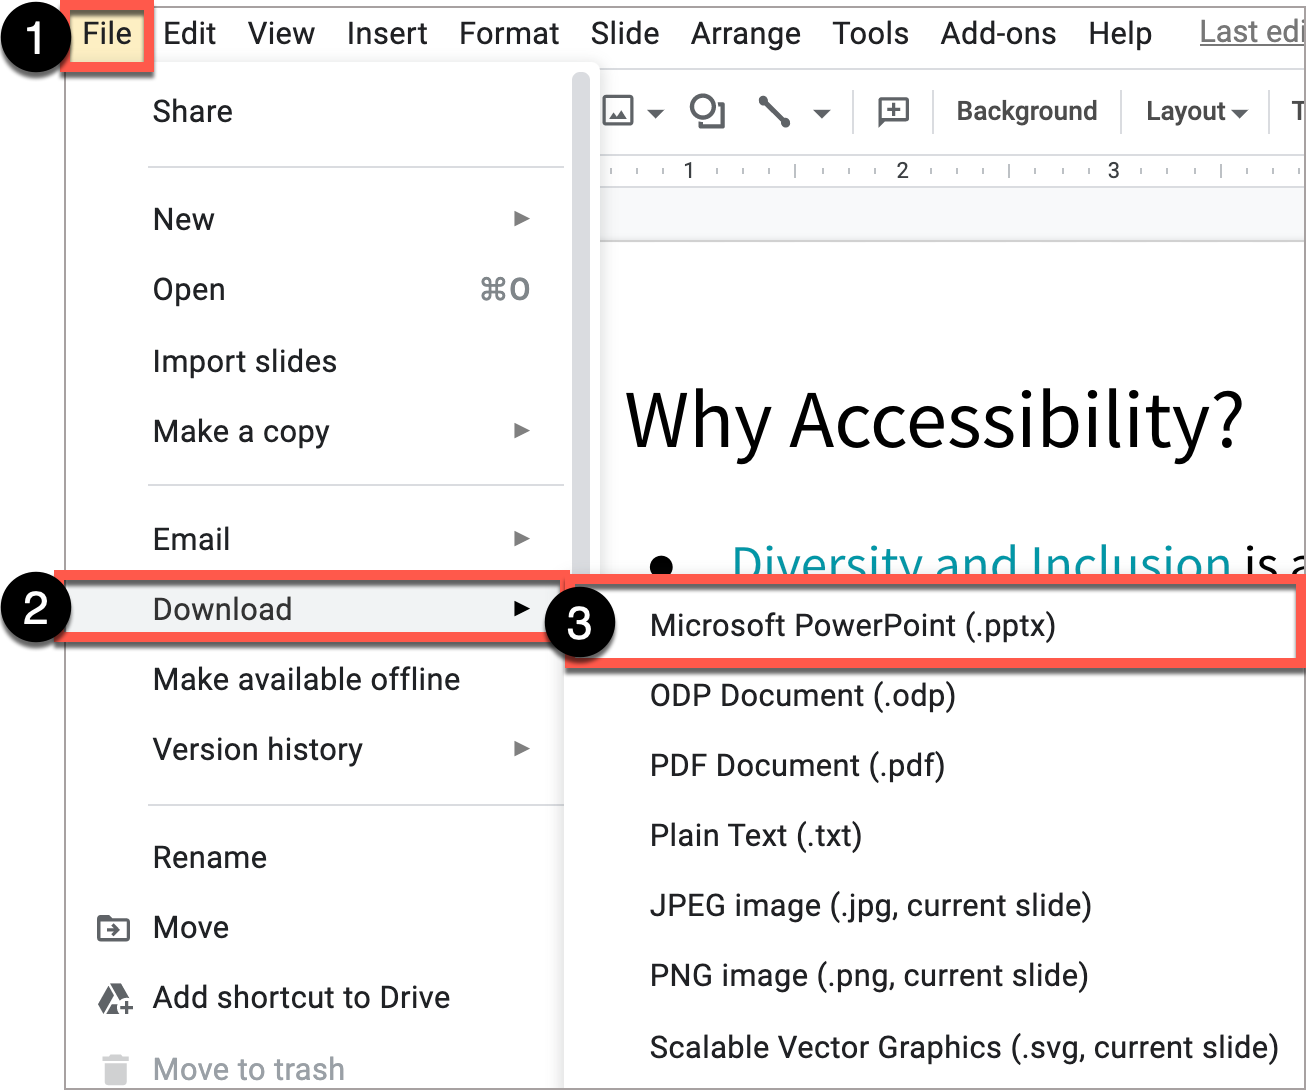
If you plan to distribute your presentation to others as an MS PowerPoint, download the Google Slides as a PowerPoint Presentation and then run the Accessibility Checker from within PowerPoint. This can help identify any potential accessibility issues and prompt you for corrections.
Download Google Slides as a PowerPoint Presentation.
Canvas is the learning management system (LMS) available for all MiraCosta classes. Canvas provides instructors with a platform to communicate with students, post course materials, and create online assignments.
Canvas accessibility best practices include:
Headings & Structure
Images
Links
Tables
Color
Extended Time for Canvas Quizzes
Headings & Structure
Headings
Headings can provide an organizational and navigational framework for a document’s content, communicating both the informational hierarchy and relationship between different sections. Headings also provide a simple mechanism for an individual using assistive technologies to “jump” from one heading to the next when navigating the document.
Highlight the brief word or phrase, or place your cursor on the line.
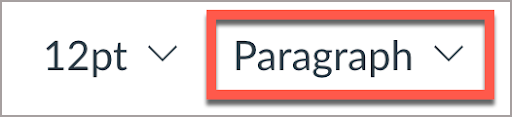
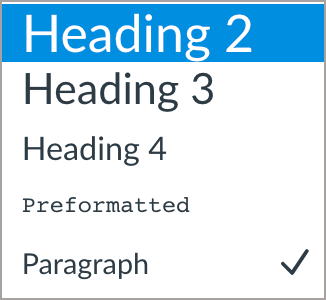
In the Rich Content Editor select the styles dropdown menu to reveal Headings 2-4.
Heading Guidelines
Headings should follow a logical structure that identifies content based on the organizational content and hierarchy of information in the document.
Canvas automatically tags the page title as Heading 1. Page content headings should start at Heading 2.
Avoid skipping heading levels.
Headings should be short and succinct.
For additional guidance on formatting, please review the information on Structure.
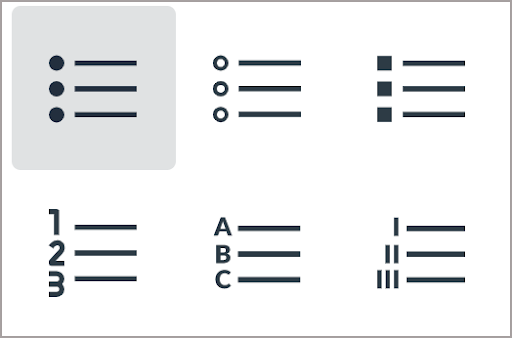
Lists
Lists provide a structured order to a group of connected or sequential content. A numbered or bulleted list may present the same information more effectively than simple data tables with fewer steps.
Highlight the grouped text.
In the rich content editor, select the appropriate list style (bullet or number list).
Formatting guidelines:
Remove any lists created manually, such as those using dashes, asterisk, or other symbol characters.
Avoid using indentation to provide a visual list in lieu of the list style button.
Numbered lists are used to present a group of items (words, phrases, sentences) that follow a sequence.
Bulleted lists are used for a group of items without a sequence.
Lists should contain at least two or more list items, unless being used to create an outline.
Nested lists are acceptable, such as a numbered list that contains a nested bulleted list.
Images
Images that support the content require a text description (also called “alt text”) that communicates the purpose and/or content of the image. This information is presented to the individual using assistive technologies, allowing them to hear the description of the image. Image descriptions should be short and communicate the main purpose of the image. Images that are decorative can be marked as such and are ignored by assistive technologies.
If a longer description of the image is necessary to fully explain its content, consider inserting a more detailed description of the image within the document text that precedes and/or follows the image.
Adding Alt Text
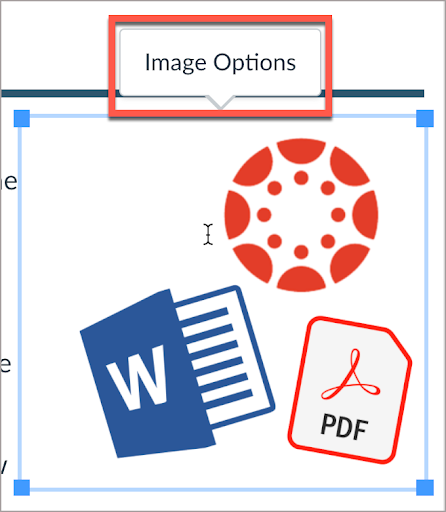
Select the image. The image should be outlined blue and have four blue squares at each edge.
When the image is selected, an Image Options will appear either above or below the image.
If the image has pedagogical value, write a brief description in the Alt Text box.
Select Done to save the information.
If the image is decorative, select the Decorative Image checkbox.
Image Guidelines
A text description should convey the purpose or content of the image in approximately 140 characters or less. Avoid repeating the same information as contained in the surrounding text.
If the image is complex, use a short alt text description for the image and then provide additional information in the surrounding text of the document.
Do not include the file format in the alt text (Example: .JPEG, .PNG).
Do not include phrases “A picture of” or “An image of” as part of the alt text.
For additional guidance on writing effective text descriptions (i.e., alt text), please review the information on Images.
Hyperlinks
Documents containing hyperlinks to websites or other online resources can be improved by using descriptive link text that is understood by the reader instead of the full URL. Using the full URL as the link text may not make sense to the reader, particularly if it is long.
Link to an External Resource
Highlight the text to be converted into a hyperlink.
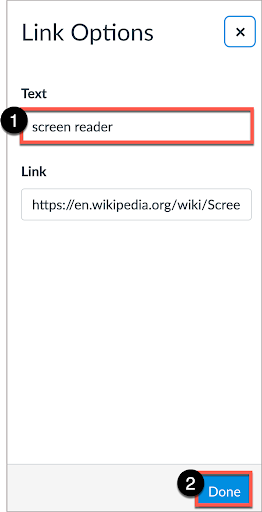
In the rich content editor > select Links > External Links.
In the “Insert Link” window, add the URL to the Link field. Select Done.
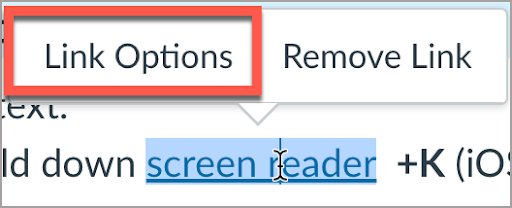
Edit an Existing Link
Place cursor on link. A submenu will appear. Select Link Options.
In the Text field, write descriptive text. Select Done.
Hyperlink Guidelines
Use link text that is descriptive and or informs the person as to the link’s destination.
For additional guidance on formatting and descriptive link text, please review the information on Hyperlinks.
Tables
Tables in Canvas should be used for data and not layout purposes. An accessible table includes the following:
At least one header (row and/or column).
Alt Text description summarizing the table.
The easiest method to ensure an accessible data table in Canvas is to use the Accessibility Checker. After you create the table in the Canvas Rich Content Editor, use the Accessibility Checker to add the appropriate table header information.
Color can be an effective method to communicate ideas and draw attention to information. Ensuring there is sufficient contrast as well as using color in combination with text formatting can support a diverse campus community, including individuals with visual disabilities.
Contrast
When choosing colors to present text information in documents, avoid pastel colors or the “light” version of a particular color. Such color options do not provide sufficient contrast against a white background. Contrast ratios should be the following:
4.5:1 for regular text
3:1 for 18 point font and larger, or 14 point font and bold
Contrast ratios may be evaluated using tools such as:
When using color to indicate a specific condition or state, include text formatting to provide a distinguishing characteristic. For example, if a list of vocabulary words were identified only in red text, this could present difficulties for an individual who has a type of color-blindness.
Use color and formatting to support accessibility, such as:
Red text with Bold formatting
Using an asterisk, brackets, or other annotation symbols in addition to color
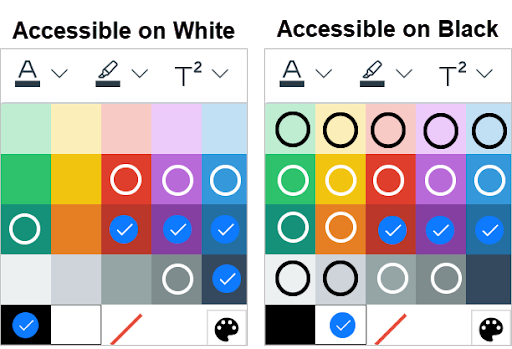
Canvas Text Color Guide
This infographic provides a guide of text colors accessible on Canvas’ white background and text colors accessible on black backgrounds as guidance. ✓ = accessible colors o = colors that are accessible only for large text (Header 2, or 18pt and larger)
Hex Code Option Now Available
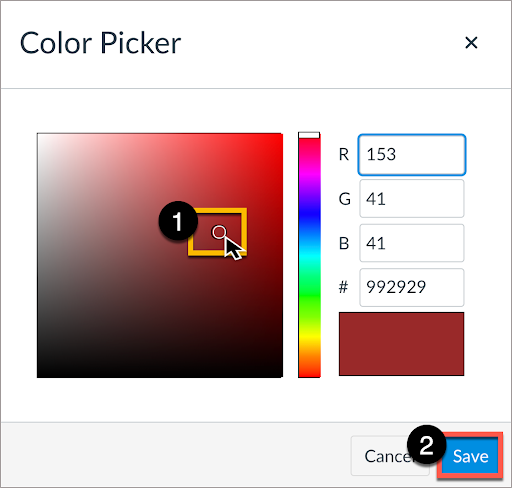
The new color palette allows for customized colors. Using the Hex code along with a color contrast tool can help you identify an appropriate color combination.
Select Text color.
Select Custom color.
The Color Picker dialogue box should appear with the option of entering either the decimal or hex code. Select Save.
Canvas Quiz and Extra Time
Some students may require additional time on a Canvas Quiz. Instructors can modify Canvas Quiz settings to allow for multiple attempts or to support students approved for an extended time. Please see the Canvas Instructor Guide: How to grant extra time or attempts in a quiz.